The Step-by-Step Process of Kitchen Countertop Installation
A Complete Step by Step Guide to Kitchen Countertop Installation
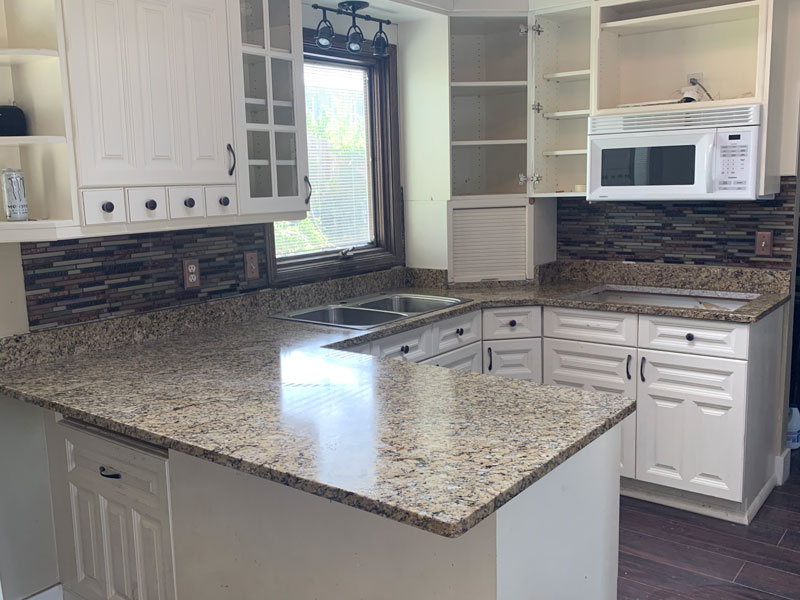
The kitchen is often called the heart of the home. It is where meals are prepared, conversations happen, and memories are made. So, when you decide to upgrade your space, few changes make as big of an impact as new stone countertops. Whether you are dreaming of the cool elegance of marble, the rugged durability of granite, or the low-maintenance beauty of quartz, new counters can completely transform the look and feel of your house.

However, a renovation project can feel overwhelming if you don’t know what to expect. You might be wondering about the timeline, the mess, or the specific steps involved in turning a raw slab of stone into a polished surface. Understanding the kitchen countertop installation process helps alleviate that stress, allowing you to focus on the excitement of your new design rather than the logistics of the construction.
Upgrading your countertops is a significant investment in your property’s value and your daily quality of life. By familiarizing yourself with the steps, from the initial measurements to the final polish, you can ensure your home is ready and the project runs smoothly. This countertop installation guide will walk you through every phase of the project, ensuring you feel confident and prepared for the big day.
What to Expect During Kitchen Countertop Installation
Installing natural stone or quartz is a construction process. While professional teams strive to minimize disruption, it is helpful to know that there will be some noise, dust, and foot traffic in your home. The installation involves heavy lifting, precise maneuvering, and the use of power tools.
Typically, the actual installation takes anywhere from a few hours to a full day, depending on the size of your kitchen and the complexity of the layout. However, the journey begins weeks before the installers arrive at your doorstep. The process requires careful planning, accurate templating, and skilled off-site fabrication.
When you work with a professional team like Signature Marble and Granite, the goal is to streamline this experience. Communication is key. You should know exactly when the crew will arrive, what you need to do to prepare, and how long the work will take. Being prepared for the realities of construction helps manage expectations and ensures the final reveal is a joyous occasion.
Consultation & Precise Measurement for Your New Countertops
Every successful kitchen countertop installation process starts with precision. Before a single cut is made into a stone slab, accurate measurements must be taken of your existing cabinets. This step is often referred to as “templating.”
During the templating appointment, a specialist visits your home to create a digital or physical model of your future countertops. This is not just about measuring length and width. The template accounts for:
- Walls that are not perfectly square.
- The location of sink centers and faucet holes.
- Overhangs for seating areas or islands.
- Cutouts for cooktops or electrical outlets.
This is a crucial time to ask questions. If you are wondering how to install countertops with a specific edge profile or backsplash height, the templating phase is the time to finalize those details. Accuracy here is vital; a mistake in measurement could lead to large gaps against the wall or a slab that doesn’t fit the cabinet base.
Modern templating often uses laser technology to capture the exact dimensions of your space within a fraction of an inch. This data is then sent to the fabrication shop, ensuring your granite countertop installation or quartz project fits your kitchen like a glove.
Professional Fabrication of Your Custom Countertop
Once the template is complete and you have selected your specific slab, the fabrication process begins. This happens off-site at a dedicated facility. This is where the raw material is transformed into a finished product ready for your home. Fabrication involves several skilled steps:
- Inspection: The stone slab is inspected for natural flaws, fissures, or scratches.
- Layout: The template is laid out onto the slab. This is an artistic step, especially for marble countertop installation or granite with high movement (veining). The fabricator decides which part of the stone will be featured on the island versus the perimeter, and they attempt to match the “flow” of the veins across seams.
- Cutting: Using high-powered bridge saws or water jets, the stone is cut to the exact dimensions of the template.
- Edging: The edges of the countertop are shaped and polished according to your design preference (e.g., bullnose, beveled, or square).
- Polishing: The surface and edges are polished to a high shine (or honed matte finish) to seal the pores and bring out the natural beauty of the stone.
This phase usually takes the longest amount of time in the countertop installation timeline, typically one to two weeks after templating. The result is a custom-fitted piece of art, ready for transport to your home.
Preparing Your Kitchen for Countertop Installation
While the fabricators are busy cutting and polishing your stone, you have some homework to do. Proper preparation is essential to ensure the safety of your home and the efficiency of the installation crew.
Clear the Path
Stone slabs are incredibly heavy. A small island slab can weigh several hundred pounds. Installers need a clear, wide path from the entry door to the kitchen. Remove rugs, plants, wall art, or furniture that might obstruct their movement. This protects your belongings and prevents tripping hazards for the crew carrying heavy loads.
Clear the Cabinets
Remove everything from your existing countertops. Move the coffee maker, toaster, knife block, and decor to a safe room. For the cabinets below the sink and cooktop, it is often wise to clear out the top drawers and the space under the sink. This gives installers access to secure the countertops from underneath and prevents dust from settling on your dishes.
Plumbing and Electrical
This is one of the most misunderstood parts of the project. Most countertop fabricators, including Signature Marble and Granite, specialize in stone, not plumbing or gas. You must arrange for a licensed plumber to disconnect your plumbing and gas lines before the installers arrive.
- Disconnect: The sink, faucet, and dishwasher must be disconnected.
- Gas: If you have a gas cooktop, the gas line must be shut off and disconnected.
- Removal: If you haven’t arranged for the installers to remove your old tops, ensure they are removed and the cabinets are level before the crew arrives.
If you are unsure who to call, ask your countertop provider. They can usually recommend a trusted, licensed plumber to handle the disconnection and the subsequent hook-up after the stone is set.
The Complete Kitchen Countertop Installation Process
The big day has arrived. Here is a step-by-step look at the installation procedure so you can follow along.
Step 1: Dry Fit and Leveling
Before applying any adhesive, the installers will place the slab sections onto your cabinets to check the fit. This is called “dry fit.” They check against the walls and ensure the overhangs are correct.
Crucially, they ensure the stone is level. Cabinets often settle over time and may not be perfectly flat. Installers use shims to level the countertop. This is vital because natural stones are rigid; if it is installed on an uneven surface, the stress could eventually cause the stone to crack.
Step 2: Joining the Seams
In many kitchens, the layout requires more than one slab. Where two pieces meet, there will be a seam. This is a delicate part of installing quartz countertops or granite.
The installers pull the two pieces tightly together using specialized seam setters (suction tools). They fill the gap with a color-matched epoxy resin. A skilled installer can mix the epoxy to match the primary color of the stone, making the seam nearly invisible to the eye and smooth to the touch.
Step 3: Securing the Countertop
Once the fit is perfect and the seams are tight, the countertops are secured to the cabinets. Installers typically use silicone adhesive applied to the tops of the cabinet frames. The weight of the stone, combined with the silicone, keeps the countertops firmly in place.
Step 4: Sink and Cooktop Installation
If you are using an undermount sink (which is most common with stone), the installers will mount the sink to the underside of the stone using clips or a harness system. They will also seal the rim of the sink with silicone to prevent water leaks.
- Note: They mount the sink bowl, but they do not connect the drain or water lines.
For cooktops, the installers will verify the cutout fits your appliance, but they will generally not install the appliance itself, especially if it involves gas connections.
Step 5: Faucet Holes
Installers will drill the holes for your faucet, soap dispenser, or air switch on-site. This ensures the placement works perfectly with your specific faucet model and the sink cabinet below.
Countertop Installation Timeline and Cost Factors
Homeowners often ask about the countertop installation timeline. Generally, the entire process—from the day you select your slab to the final installation—takes about 2 to 4 weeks.
- Week 1: Selection and Templating.
- Weeks 2-3: Fabrication (cutting and polishing).
- Week 4: Installation (usually takes 1 day).
Understanding Costs
The countertop installation cost varies significantly based on several factors:
- Material: Exotic granites and marbles cost more than standard granite or quartz.
- Square Footage: More material equals higher cost.
- Complexity: A kitchen with many angles, cutouts, and seams requires more labor than a straight galley kitchen.
- Edge Profiles: Elaborate edges (like Ogee or Triple Pencil) are more labor-intensive to fabricate than standard Eased edges.
- Removal: If you hire the company to demo and haul away your old countertops, this will be an additional line item on your quote.
Aftercare Tips to Protect and Maintain Your New Stone Countertops
Once the crew leaves and the plumber have reconnected your water, your new kitchen is ready for use. To keep your investment looking pristine, follow these care guidelines.
For Granite and Marble:
Natural stone is porous. While most are sealed during fabrication, granite countertop installation requires ongoing maintenance. You should re-seal your granite roughly once a year. Marble is softer and more prone to etching from acids (like lemon juice or vinegar), so wipe up spills immediately. Use a pH-neutral cleaner designed for stone, rather than harsh abrasive chemicals.
For Quartz:
If you choose installing quartz countertops, your maintenance is simpler. Quartz is non-porous and does not require sealing. It is highly resistant to staining. However, it is not heat-proof. Always use trivets or hot pads for pots and pans, as extreme heat can damage the resin binders in the quartz.
General Cleaning:
For all stone surfaces, mild soap and warm water are usually the best cleaning solution. Avoid using scrubbing pads or steel wool, which can dull the polished finish over time.
Frequently Asked Questions
How long do I have to wait to use my sink after installation?
We recommend waiting at least 24 hours before reconnecting the plumbing. This allows the silicone used to mount the sink and the adhesives used in the seams to cure completely, ensuring a watertight and durable bond.
Do you handle the plumbing and electrical work?
No, we specialize in stone fabrication and installation. We do not perform plumbing or electrical work. You will need to arrange for a licensed plumber to disconnect your old plumbing before we arrive and to reconnect the new fixtures 24 hours after we finish.
Will there be visible seams in my granite or quartz?
While we strive to make seams as invisible as possible, they are a necessary part of most installations. We use color-matched epoxy and place seams in discreet locations whenever possible. Visibility often depends on the grain and movement of the stone; highly patterned granite hides seams better than solid color quartz.
Can I install new countertops on my existing cabinets?
Yes, provided your cabinets are structurally sound and level. During the measurement phase, we will assess your cabinets to ensure they can support the heavy weight of natural stone. If they are not level, we can often correct minor issues with shims during installation.
Does the installation create a lot of dust?
There will be some dust, primarily when we drill faucet holes or make minor on-site adjustments. Our installers use vacuums and dust containment methods to minimize the mess, but we recommend covering nearby furniture and clearing the counters to keep cleanup easy.
Transform Your Kitchen with Signature Marble and Granite Team
New countertops are more than just a surface; they are the foundation of your kitchen’s design and functionality. While the kitchen countertop installation process involves many steps and skilled coordination, the result is a durable, beautiful upgrade that adds lasting value to your home.
At Signature Marble and Granite, we take pride in guiding our clients through every stage of this journey. From helping you select the perfect slab to the final precision installation, our team is dedicated to quality and customer satisfaction. We even support our local community through the Little Miracles Project, ensuring that the beauty of stone is accessible to families in need.
If you are ready to start your project or simply have more questions about materials and timelines, we are here to help. Contact us today to schedule your consultation and take the first step toward the kitchen of your dreams.